Contributing#
This project is a collaborative team effort, and we want to make contributing as easy as possible. This page provides a small workthrough for contributing to the IOER FDZ Geospatial Training Materials. We have a public mirror of the Repository on Github. If you have any questions, please open a new discussion on GitHub. If you would like to contribute, we welcome any merge requests. For bug reports and other issues, use the GitHub issue tracker or contact the IOER FDZ team.
 Made with❤️, Collaboration, and Open Source Software. Picture: 2021 Alexander Dunkel
Table of Contents
1. Overview of files#
All documents are edited as Jupyter notebooks and can be found in the subfolder notebooks/, e.g.:
File Inventory (Key Directories and Files):
notebooks/: Contains the core content as Jupyter Notebook (.ipynb) files. These include theoretical explanations and practical coding exercises.00_data/: Contains example base data files used in some notebooks, such as Biotope data for Dresden (Biotopwerte_Dresden_2018.*), an example GBIF query result (occurrences_query.csv), and other supporting data likeclc_legend.csv.out/: Contains example output files generated by running the code in the Jupyter notebooks (e.g.,release_v1.8.0.zip, GeoPackages/Shapefiles with processed spatial data likeclipped.gpkg, raster files likeS12RG_2023_200m_DE.tif, figures, HTML maps). These represent results from a specific run at the time of archival.py/modules/: Contains auxiliary Python scripts (.py) with helper functions used within the notebooks.resources/: Contains static image files (.png,.gif,.webp,.jpg) and other resources embedded within the notebooks or used in the documentation._static/: Contains static assets (CSS, fonts, images, videos) for building the Jupyter Book HTML website._ext/: Custom extensions for the Jupyter Book build process (customized APA citation style).scripts/: Utility scripts (e.g.,patch_binder_links.shfor Jupyter4NFDI resource override).tests/: Test scripts (e.g.,link-check.shfor cross-reference & website link integrity)..pandoc/: Configuration and assets for Pandoc-based README rendering..templates/: Templates, e.g., forCHANGELOG.mdgeneration.tmp/: Temporary files or source data for processing (e.g.,vg2500administrative boundaries). Note: Data intmp/is intermediate and not directly part of the final curated dataset examples in00_data/._config.yml,_toc.yml: The central configuration file for the Jupyter Book build process. Add or Update the TOC/Chapters here.pyproject.toml: Defines Python project dependencies for reproducibility (semantic release configuration)..gitlab-ci.yml: GitLab CI/CD pipeline configuration for automating build and deployment.LICENSE.md: License information for the repository content.README.md: This file.CONTRIBUTING.md: Guidelines for contributing.CHANGELOG.md: Records changes across versions. Updated automatically.references.bib,BIBLIOGRAPHY.md: Bibliographic information. Add any bibtext-references here.Other configuration files (
.gitignore,.version,conf.json,nbconvert.tpl, etc.).
Versioning:
The repository uses Git for version control.
Semantic Versioning is applied, managed with python-semantic-release.
Versions follow the Semantic Version Specification (MAJOR.MINOR.PATCH).
Commit messages follow the Conventional Commits Specification v1.0.0
This replication package corresponds to Version 1.8.0.
File Relationships:
Jupyter notebooks in
notebooks/are primary source files.Notebooks read input data from external APIs (GBIF, IOER Monitor) or example files in
00_data/.Running code in notebooks generates output files in
out/.Helper functions from
py/modules/are used in notebooks..gitlab-ci.ymlis the central CI&CD pipeline configuration; uses Jupyter Book (_config.yml,_toc.yml) to build the HTML website.pyproject.tomllists Python dependencies.
Additional Materials:
The live, rendered version of these training materials is available at: https://training.fdz.ioer.info/
A public mirror of the development repository is available on GitHub: ioer-dresden/jupyter-book-nfdi4biodiversity
2. Publishing process#
Files are stored in this git repository. When changes are made to the notebook files, an automation is triggered to update the website at https://training.fdz.ioer.info (git branch main) and https://stag.training.fdz.ioer.info/ (git branch staging).
These two sites help to incrementally improve the training materials:
https://stag.training.fdz.ioer.info/ - always up-to-date, see documentation changes immediately. This page is only visible from the IOER Intranet
https://training.fdz.ioer.info - a “production” version that looks more polished; changes from the staging branch are selectively merged in. This page is publicly visible
Start working on the staging branch. We pull changes that are ready into the main (production) branch.
The process for a single notebook change:

3. Editing files#
You can edit these files from anywhere. However, depending on your knowledge of git, we suggest one of the following:
Request access to the Gitlab Chemnitz
For IOER-Internal use only: In order to participate, request access to the Gitlab Chemnitz Group.
Use a common Jupyter Server for collaborative editing and follow the steps outlined under 4: Jupyter Collaborative Editing.
Edit files directly in the Gitlab Repository
Clone the repository locally and edit the Jupyter notebook files directly using your preferred environment. Only use this option if you are familiar with git!
4. Jupyter Collaborative Editing#
Join a collaborative Jupyter session in your browser.
4.1 Start with editing a Jupyter notebook#
Fig. 19 Start with editing a Jupyter notebook.#
Save changes to the notebook file with CTRL+S.
4.2 Open the Jupyter git extension#
Fig. 20 Find the JupyterLab Git extension.#
Note that we are on the git branch called staging. We can also see that the notebook 01_introduction.ipynb has changes that are not yet commited.
4.3 Commit changes#
Fig. 21 “Staging” changes#
For all changed files you want to update, click the + icon. This is called staging in git.
4.4 Write a commit message#
Fig. 22 Write a commit message.#
Write a short description of what the changes are, then click commit. You may be asked to enter your name and email once.
4.5 Push changes to remote#
If you see an orange dot next to the left icon, click to first pull changes:
Fig. 23 Click on “Pull changes from remote”#
Fig. 24 Click on “Push changes to remote”.#
4.6 Wait for the website to update#
Head to https://gitlab.hrz.tu-chemnitz.de/ioer/fdz/jupyter-book-nfdi4biodiversity/-/pipelines and wait until the Continuous Integration pipeline finished updating the website.
This will take about 1-2 Minutes.

Fig. 25 A passed pipeline with two stages (green checkmarks).#
Once you see two green checkmarks, open the staging website and have a look at the updated website.
https://stag.training.fdz.ioer.info/
Fig. 26 The rendered training materials with the changed text.#
5. Git best practices#
Commit often. After any change, commit changes and push to remote. This also ensures your data is backed up and always up to date.
When you start your day, always pull the latest changes from remote first. This ensures that you have the latest version locally and do not have to merge past changes later.
If you want to maintain your work in progress, it is possible to store copies of notebooks under
tmp/folder. Changes in this folder are ignored. Once you are happy with your progress, manually copy & paste cells or content to the original notebook files, to commit these changes.
6. Semantic Versioning#
The book is automatically versioned using the python-semantic-release. It follows the Semantic Version Specification (MAJOR.MINOR.PATCH). Please follow the Conventional Commits Specification for writing your commit messages (see also Semantic Commit Message Conventions). Our continuous integration will pick up commit messages, bump versions accordingly, and update the Changelog.
Since these training materials consists of a mixture of code, comments, documentation and results, we suggest to follow the below examples.
Documentation, descriptions or any code comments changed#
Use:
docs: improved description of chapter 1
The same applies to minor changes such as fixing typos: Use:
docs: fixed typo
These changes will not result in any version bump, but they will be listed as improvements under Documentation in the next release.
Minor code changes, bug fixes#
Use:
fix: issue with matplotlib and legend in figure 7
This will result in a new patch release.
Significant code changes, larger changes to the book structure#
Use:
feat: added an interactive map (folium) to chapter 7
This will result in a new minor release.
Changes to the Continuous Integration#
Use:
ci: fix registry image not accessible
These changes will not result in any version bump, but they will be listed as improvements under Continuous Integration in the next release.
Other commit messages#
There are a number of other message types, such as refactor, style, (etc.). All of these will not cause a version bump and can be used if
and can be used if it fits.
7. Formatting conventions#
We want to make sure that we systematically reuse certain visual elements in the training materials. This is a collection of agreed style conventions.
General conventions are:
Use short sentences. As a guide, use no more than 10 to 15 words.
Use the
.webpformat for figures. Irfanview with plugins comes withwebpsupport, so it is easy to capture and save webp files.
Check language and spelling (DeepL/Grammarly check)#
Words convey meaning, so it is best to use simple and easy to understand sentences. Tools like Grammarly or Linguee DeepL can help with this. Be sure to use American English for training materials.
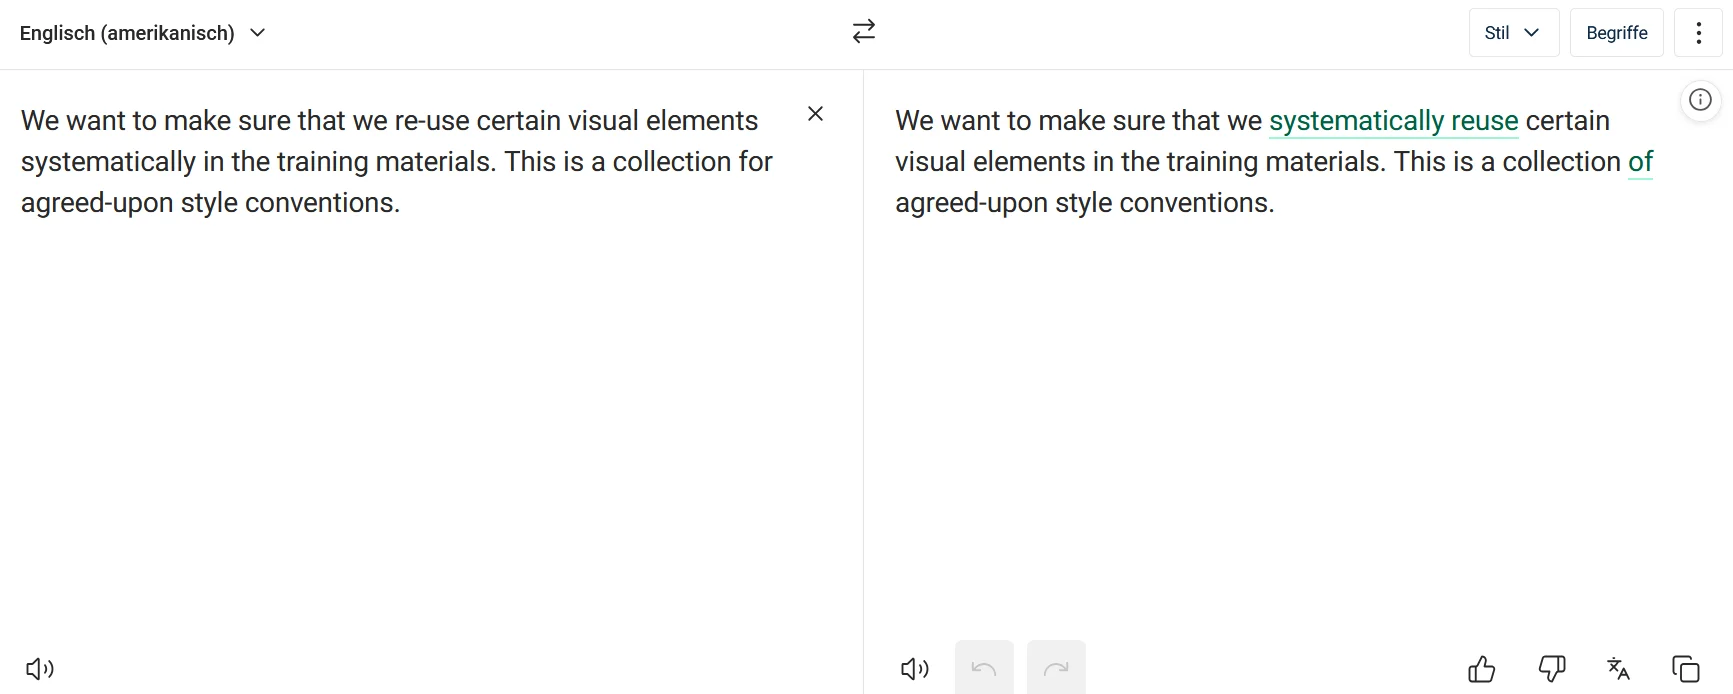
Fig. 27 Linguee DeepL Grammar Check.#
Figure and Table formatting#
See the Jupyter Book docs on how to create Figures and Tables with caption.
There is a box-shadow effect shown around figures by default. If you want to disable this on selected graphics, add :figclass: fig-no-shadow to the {figure}-tag.
Like so
```{figure} ../resources/data-processing.png
:name: gbif-graphic
:figclass: fig-no-shadow

GBIF Data Processing Documentation
```
Cross-refererences#
In order to not break cross-references, whenever using those, add an explicit cross-references anchor. These will stay the same even if headers (etc.) change:
(content:references:explitanchor)=
## Reference section labels
Then use the anchor to create a cross-reference
[Link Text](content:references:explitanchor)
See the docs
Requires user action (attention call)#
Our goal is to make the training material interactive. The user can change certain parts of the code and this will affect the results of further processing.
To highlight where the user can make these changes, we use callouts (admonitions) with the attention flag. These callouts are highlighted in orange.
Below is an example that uses a dropdown in addition to the attention to further pique the user’s curiosity.
See example
```{admonition} Use your own common name!
:class: dropdown, attention
Optionally replace "English Sparrow" with another location above
```
See in action.
Admonitions#
Admonitions can ease reading flows by highlighting certain paragraphs differently.
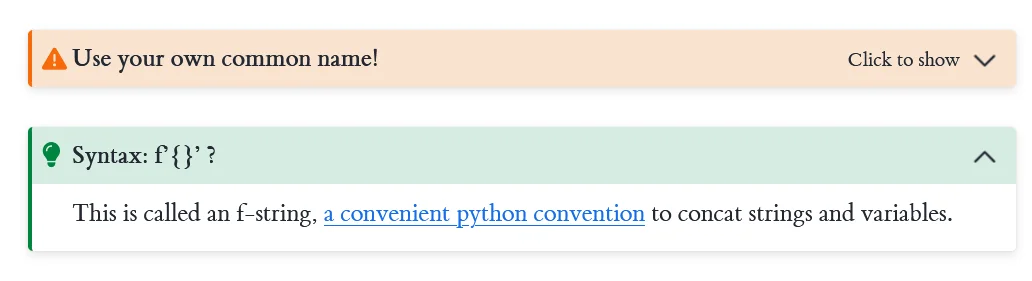
Fig. 28 Two admonitions (with the drop-down feature enabled).#
In Markdown, formatting looks like this:
:::{note}
Callout Text
:::
Tip
It is up to you whether you use ::: or ```.
If you want to further replace the title:
```{admonition} Use your own title
:class: note
Callout Text
```
The full list of available admonitions can be found in the sphinx-docs.
The use of admonitions sometimes requires to nest different outputs. For example, maybe you want to show a code block inside an admonition. In this case, adding backticks (`) to the outer block need to be used.
See example
````{admonition} Use your own common name!
:class: dropdown, attention
Optionally replace "English Sparrow" with another location above
```python
# code block
```
````
In other cases, you may want to show images or other output rendered in a cell inside admonitions (e.g.). This is done with the glue-directive. See the Jupyter book docs. There is also an example in the file 202_data_retrieval.ipynb, see the result here.
Overview first, details on demand#
Overview first, details on demand (Schneiderman’s Mantra): Admonitions with drop-down are a good way to hide too much information in Markdown cells.
Another way to hide information in input and output cells are cell tags.
For example, to hide a long cell output, add hide-output to cell metadata. You can find cell metadata on the upper-right corner in Jupyter.
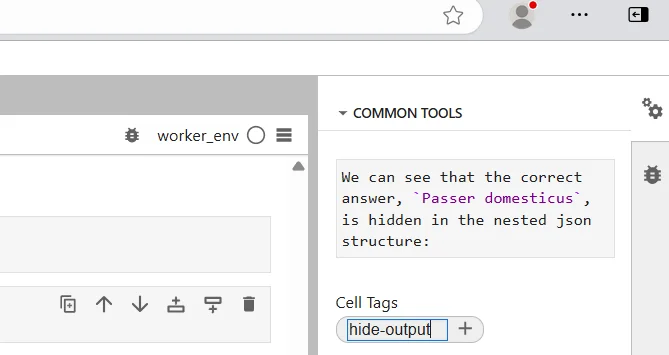
Fig. 29 Add hide-output to a cell’s metadata to hide its output with a drop-down link.#
8. Citations, references#
Citations are managed with sphinxcontrib-bibtex. See the Jupyter Book docs here.
1. Add bib-metadata
In order to add literature, first add the reference (*.bib format) to references.bib file in the root or the repository.
How to get the bib format?
You can sometimes download *.bib-metadata as “citations” from publication pages. Otherwise, use e.g. Zotero to export the publication to a *.bib file, open it, and copy the contents to references.bib.
2. Get reference
Your newly added bib-entry has a unique identifier, e.g. dworczyk_replication_2025. Memorize this reference.
3. Use reference
Depending on how you want to use the reference, these are some examples:
{cite:ts}`salek_house_2015`
will be rendered as (full author list, without et al.):
{cite:t}`fischer_2023_10377868`
will be rendered as (in-text):
The **F**indable **A**cessible **I**nteroperable **R**eusable (**FAIR**) principles *({cite:alp}`wilkinson_fair_2016`)*
will be rendered as (no parenthesis)
The Findable Acessible Interoperable Reusable (FAIR) principles (Wilkinson *et al.* 2016)
4. Add a chapter bibliography
If you want to show a list of references used at the end of each notebook, add the follow to the last cell of your notebook:
## References

```{bibliography}
:style: unsrt
:filter: docname in docnames
```
5. Add a global bibliography
Create a new file BIBLIOGRAPHY.md and add:
# Bibliography

```{bibliography} references.bib
:style: plain
```
Link this file in the _toc.yml. This will list all references used throughout your book.
9. Reproducible Science in Action: Carto-Lab Docker#
If you want to know more about the technical infrastructure and Reasearch Data Management (RDM) concept behind the training materials, have a look at our IOER FDZ Carto-Lab Docker documentation. We also presented these Training Materials, together with the Carto-Lab Docker at the 2nd Conference on Research Data Infrastructure (CoRDI 2025) in Aachen, Germany. The poster provides a comprehensive visual summary of the Carto-Lab Docker RDM philosophy, its three-pillar architecture, and use cases such as the training materials.

Fig. 30 The research data management philosophy behind the training materials - turning good RDM practices from a theoretical ideal into a practical reality. Read further here.#
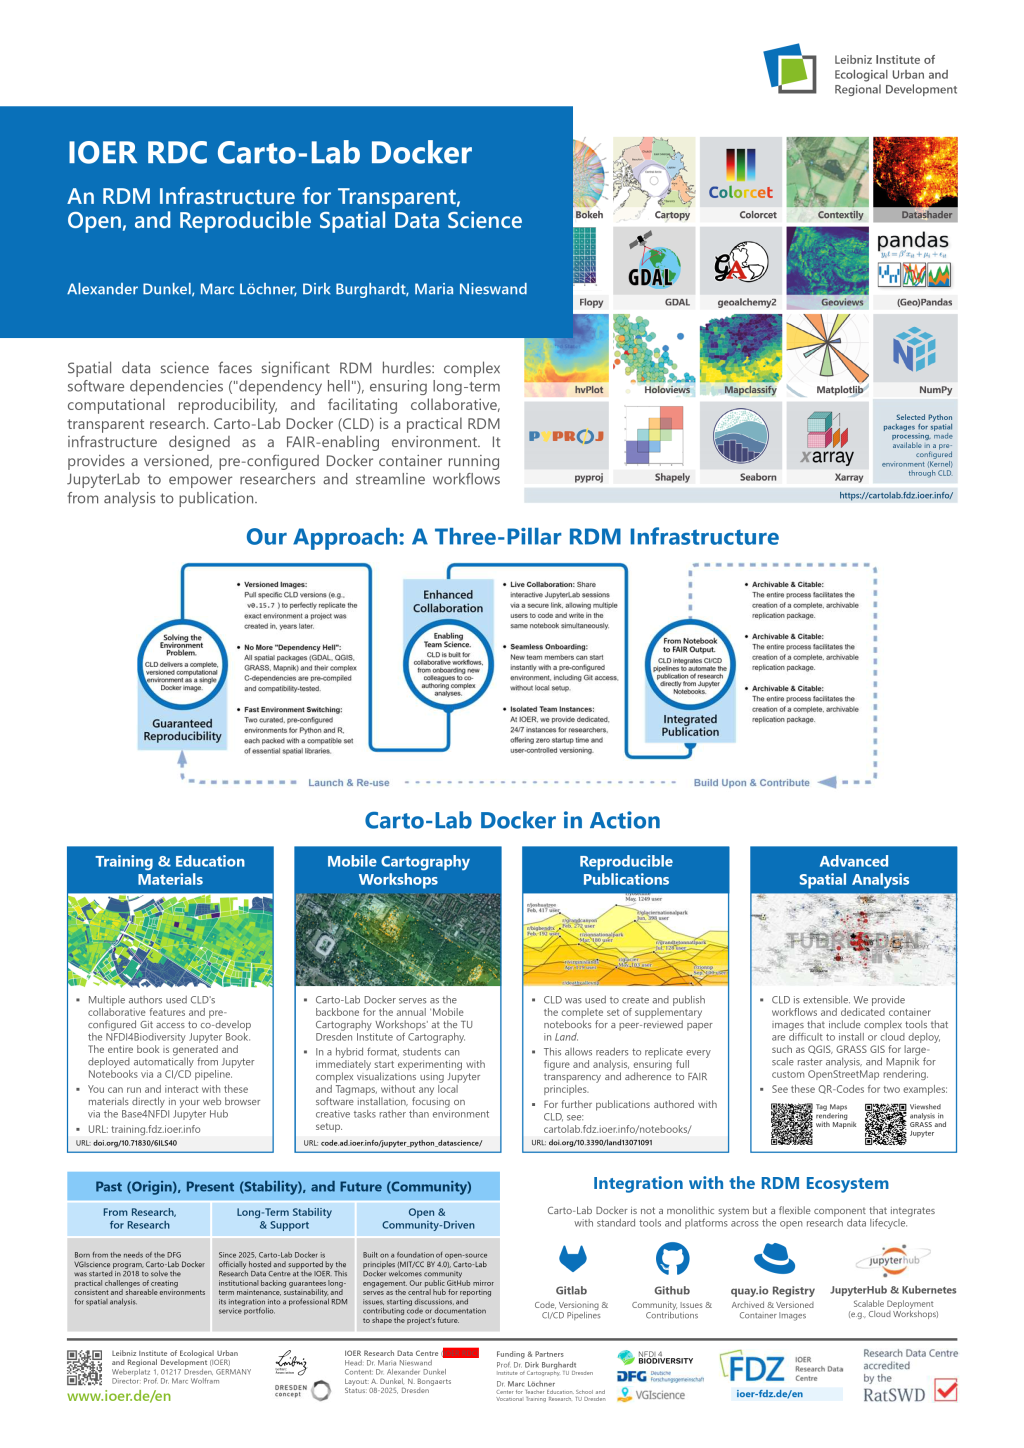
Fig. 31 The poster about the training materials and the Carto-Lab Docker that we presented at the 2nd Conference on Research Data Infrastructure (CoRDI 2025) in Aachen, Germany. A PDF is available here.#